MD Page main prefinal: Difference between revisions
SnakeTuning (talk | contribs) Tag: wikieditor |
SnakeTuning (talk | contribs) Tag: wikieditor |
||
| Line 19: | Line 19: | ||
'''OBD1 ECUs''' | '''OBD1 ECUs'''<br/> | ||
'''[[MD0_M66207_Denshigiken|Denshi Giken M66207 Based ECUs]]''' | '''[[MD0_M66207_Denshigiken|Denshi Giken M66207 Based ECUs]]''' | ||
*92-95 Civic (5th gen) | *92-95 Civic (5th gen) | ||
| Line 42: | Line 42: | ||
'''OBD2A ECUs''' | '''OBD2A ECUs'''<br/> | ||
'''[[MD0_M66507_Denshigiken|Denshi Giken M66507 Based ECUs]]''' | '''[[MD0_M66507_Denshigiken|Denshi Giken M66507 Based ECUs]]''' | ||
*96-98 Civic (6th gen) | *96-98 Civic (6th gen) | ||
| Line 52: | Line 52: | ||
'''OBD2B ECUs''' | '''OBD2B ECUs'''<br/> | ||
'''[[MD0_M66589_Keihin|Keihin M66589 Based ECUs]]''' | '''[[MD0_M66589_Keihin|Keihin M66589 Based ECUs]]''' | ||
*99-01 Civic (6th Gen) | *99-01 Civic (6th Gen) | ||
Revision as of 17:37, 28 May 2024
Description
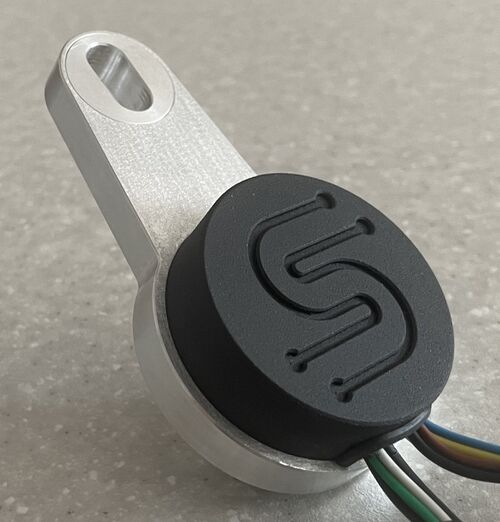
SNAKE MINI DIZZY - is the world's smallest device designed for complete removal of the OEM distributor and conversion to Individual Coils (Coil on Plug). Compatible with both OEM and Aftermarket Standalone ECUs.
Despite the age of the Honda engines from the "Distributor Era" (B, D, F, and H Series), they remain highly popular in the tuning community. A significant drawback of these older engines is their distributor-based ignition system, which includes a high-voltage section and "temperamental" VR Sensors.
SNAKE MINI DIZZY eliminates these shortcomings, enhancing engine performance and reliability.
Advantages
- Easy Configuration via Bluetooth Connection
- Improved ignition timing precision due to the absence of VR sensors
- Better spark energy without the inefficiencies of a traditional distributor system.
- Less cluttered engine bay, making it easier to perform maintenance and modifications.
ECU Preparation
Для правильной работы Mini Dizzy со штатным ЭБУ требуется его модификация для работы с низковольтными сигналами (Patent Pending).
Standalone ECUs не требуют доработок и работают из коробки с 5В сигналами.
OBD1 ECUs
Denshi Giken M66207 Based ECUs
- 92-95 Civic (5th gen)
- 92-95 CR-X (3rd gen)
- 92-93 Integra (2nd gen)
- 93-95 Integra (3rd gen)
- 92-97 Domani (1st gen)
- 94-97 Civic (5.5th gen UK Spec)
- 95-97 Rover 400 (with Honda D16 Engine)
- 98-01 Civic (5.5th gen UK Spec)
- 98-99 Rover 400 (with Honda D16 Engine)
- 99-05 Rover 45 (with Honda D16 Engine)
Denshi Giken M66911 Based ECUs
- 90-93 Accord (4th gen)
- 94-95 Accord (5th gen USA Spec)
- 93-98 Accord (5th gen EURO Spec)
- 92-96 Prelude (4th gen)
Denshi Giken D78334 Based ECUs
- 96-97 Honda CR-V (1st gen JDM Spec)
OBD2A ECUs
Denshi Giken M66507 Based ECUs
- 96-98 Civic (6th gen)
- 96-98 CR-X (3rd gen)
- 96-99 Integra (3rd gen)
Denshi Giken M66509 Based ECUs
- 96-97 Accord (5th Gen USA Spec)
- 96-01 Prelude (5th Gen)
OBD2B ECUs
Keihin M66589 Based ECUs
- 99-01 Civic (6th Gen)
- 00-01 Integra (3rd Gen)
- 99-01 CR-V (1st gen)
- 98-02 Accord (6th gen USA Spec)
- 98-02 Accord (6th gen EURO Spec)
- 98-02 Accord (6th gen EURO Spec with LAF Sensor)
Installation
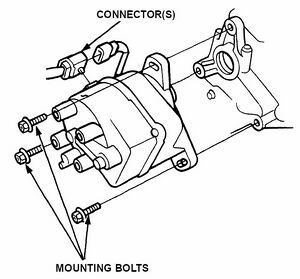
- STEP 1: Remove OEM Distributor
- Disconnect Connector(s) from the distributor
- Disconnect the plug wires from the cap
- Remove the distributor mounting bolts
- Remove distributor from cylinder head.
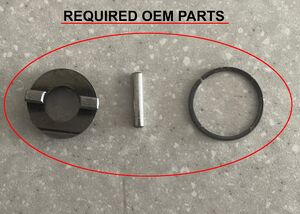
- STEP 2: Remove following parts from the Distributor
- Coupling
- Pin
- Pin retainer
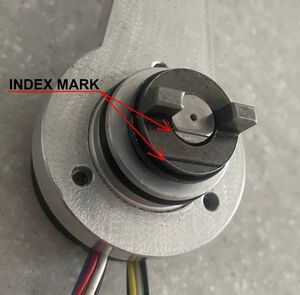
- STEP 3: Install Coupling to Device
- Install Coupling to the shaft.
- Align the index mark of shaft and coupling.
- Drive in the pin
- Secure it with the pin retainer
- STEP 4: Install Device to cylinder head
- Coat O-Ring with engine oil
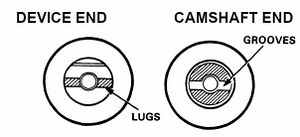
- Align offset of the lugs on the end of Device and its mating grooves in the Camshaft.
- Slip Device into position
- Install and tighten one mounting bolt (any desired mounting point)
- Install Coils and Wiring
- Connect Connector(s) to Device
Well Done!
Configuration
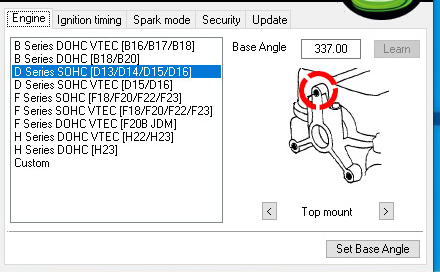
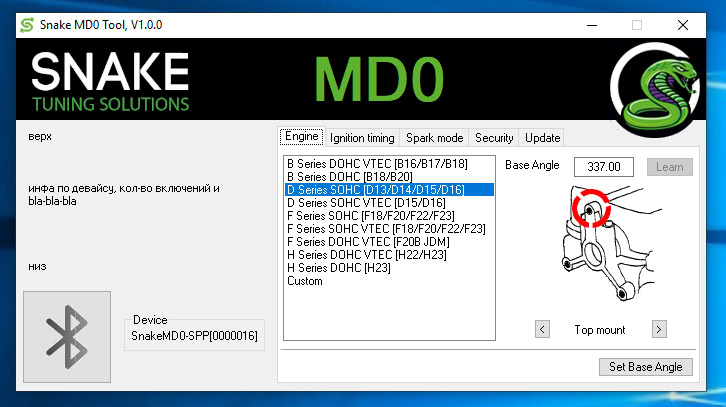
Перед первым стартом необходимо настроить девайс при помощи утилиты. Определить тип Вашего двигателя, точку монтирования утсройства и модель искрообразования. Так же при необходимости установить пароль на подключение.
- Engine Описание двух путей. выбор из стандартного угла либо обучение.
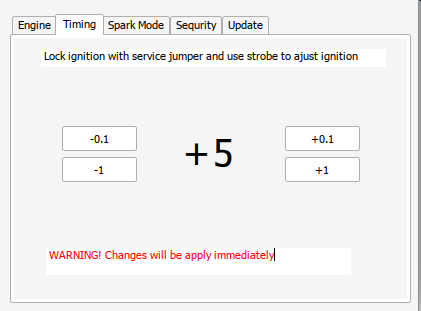
- Timing Описание процесса выставления зажигания стробом и утилитой
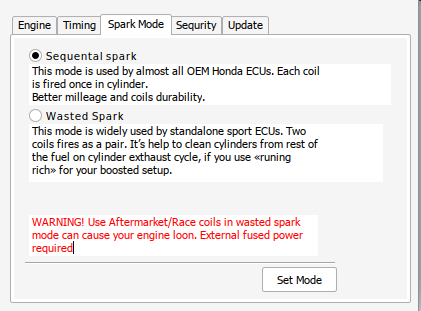
- Spark Mode Выбор режима искры Wasted или sequential. Описать оба типа и их различие
- Security Добавление пароля на подключение. По умолчанию пароля нет.
Troubleshooting
Bluetooth Connection
